
Piano Magic was lucky enough to get our hands on a 133 year old Julius Feurich piano. We’re keeping it in it’s original condition but making great improvements so that it will play beautifully.
After the strip down we take a pattern of the bass strings so they can be re manufactured.
To replace the Bass strings they need to be re manufactured in Sydney. We are very fortunate to have in Australia one of if not the best bass string maker in the world. However we need a pattern so he has the length of copper to wind on the string. It is a very exacting science. The treble strings are made from plain music wire and we use different sizes for each 6 notes.
The next step is to strip the strings and evaluate the down bearing on the soundboard. The soundboard needs to have downward pressure to achieve the best tone. I have stripped the old strings off and replaced them with new wire.
Now it’s time to fit the new Wessel Nickel & Gross action.
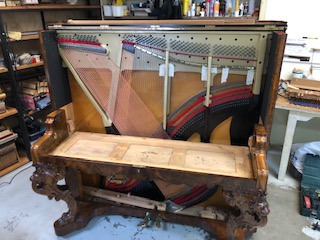
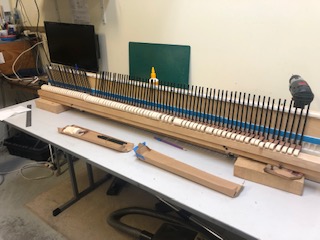
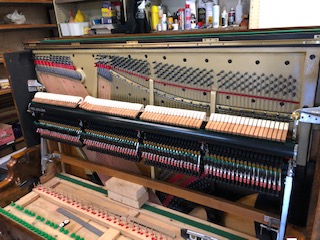
I have stripped the case to a bare open space with the strike points marked on the tape on the strings.
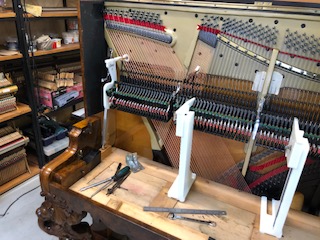
The action unboxed needs to be fitted with the mounting guides and support brackets.

These brackets screw onto the action where the hammer and Wippen are screwed on.
So I have the support brackets and guides screwed to the action frame and the support stands are in the piano ready to hold the action in the right place.
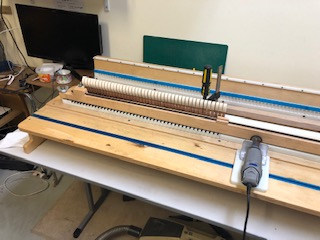
I now have the action where it needs to be and I have lengthened the action stand so the action is resting on the key bed.
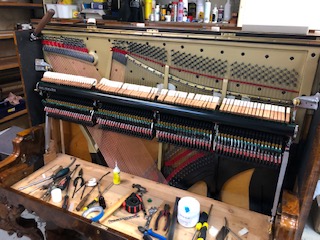
Again for the treble end the action stand is resting on the key bed. Now the top of the action frame is is supported by a bracket and the damper line is marked out with the tape.

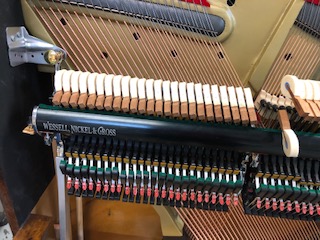
Damper heads are all set in place.
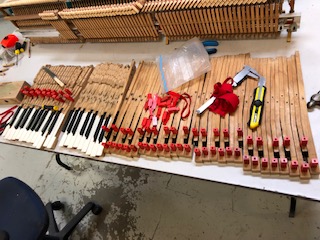
Drilling the hammers and glueing them into position
So now the tricky bit. Setting up the hammer line. As this piano was an over damper the cross over of the strings is closer to the strike point so this leaves very little room for the damper underneath. So setting up the hammer line is imperative to getting nice tone in the piano.
Once the hammer line is established I use a nifty little cutter to cut the hammer shanks to the right length by cut the base first.

Then I cut the treble.
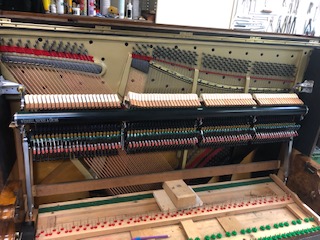
Bass hammers are glued. Note: there was one hammer facing the wrong way – just one that got away. All fixed.
The hammers are put into the action to check the height and to make sure they are even. The hammers closest to the bass hammers are cut last and need to allow clearance for the dampers. Hammers all glued in and looking nice. So now I have the problem of the hole between the bottom of the action and the top of the keys. So here is the reason I extended the action stands.
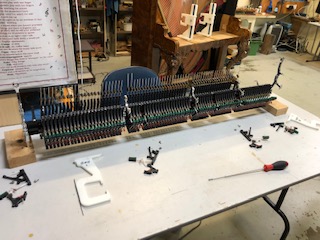
Next step: The Wippens
So here we have the old Wippens taken out of the old action. The bottom part of the wippen called the sticker is what I will use to fill the gap between and action and keys. Some of these need to be rebushed to make them as good as new.

I set the sticker support rail in place
Opps went to get the keys and found they needed the bushings replaced. Another day gone west.
Setting up the sticker support rail height and organising the sticker length. Great to have the action work stands to turn the action upside down.
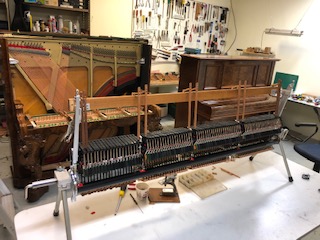
So now the stickers are in place and the sticker support rail is fixed in place.

The action upside down again and I am gluing on the pilot felts to the stickers. Theirs is where the key rubs on the sticker. Now it’s all finished and ready to go into the piano.
The Assembly
With the action in the piano, I’ll also place the keys in and do the regulation. This is where I make the whole thing work.

All finished. I wish. Just checkin that the case parts don’t rub on the action. On one of my last WNG replacements I had to take 1cm of wood off the back of the top door. Just as well it had plenty of meat on it.
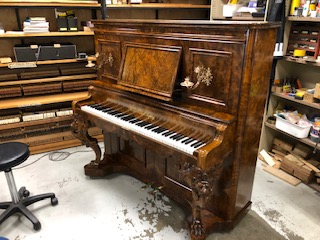
The finished product
Come into Piano Magic to see the piano in action. Contact us today.
Were you following our rebuild series? See the history and assessment.